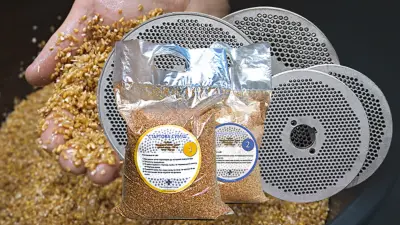
Purchasing a pellet mill for feed or biomass production is a practical solution for farming and private operations, enabling the independent manufacturing of balanced compound feed with precise nutritional control. However, starting up new equipment often comes with initial challenges: instead of dense, shiny pellets discharging from the chute, the machine emits hot dry powder, raw material sticks to the rollers, and the die holes quickly become tightly clogged.
This situation is completely normal and does not indicate a manufacturing defect. Any new pellet mills come equipped with components that have undergone precision machining and heat treatment. Inside the channels of a new die, microscopic surface irregularities, cutter marks, and oxide scale remain. Until the compression channels attain a mirror-like finish, internal friction remains excessively high. Manufacturers generally do not perform mirror polishing at the factory, as a polished part loses its brand-new commercial appearance. Therefore, the primary task of the operator prior to full production is to properly set the operating clearance and break in the die channels using a dedicated abrasive oil mixture. For smallholding operations, compact GKM pellet mills or OGP pellet mills are commonly selected, whereas pellet production from biomass utilizes heavy-duty Grand pellet mills.
Preparing the Pellet Mill for the First Start
Before connecting the unit to the mains electrical grid, perform a comprehensive inspection of all mechanical assemblies to ensure secure connections and protect bearings and moving parts from premature wear.
- Bedframe installation and stability: The pelletizer must be set on a level, solid surface such as a concrete foundation or heavy-duty workbench. Bolting the frame down with anchor bolts is strongly recommended. For operator comfort and safety, equip the working perimeter with a slatted wooden duckboard platform, which also significantly enhances electrical safety in high-moisture rooms.
- Hardware inspection: Following transport, carefully torque all threaded connections across the press unit body, chassis, protective guards, and electric motor mount.
- V-belt tension check: Belts transfer torque while shielding the motor from sudden jamming; therefore, tension must be set accurately. A rapid field test: grip the belt midway between the pulleys and twist it along its longitudinal axis using hand force. It should rotate exactly 90 degrees. If it turns further, the drive belt is loose and will slip; if it cannot rotate 90 degrees, the drive is over-tightened, placing destructive radial loads on shaft bearings. Under instrumental checking, applying a force of 25 N (2.5 kgf) should produce a belt deflection of 4–5 mm. To ensure maximum durability, cogged V-belts are recommended.
- Electrical wiring and safe start: The power feed must have dedicated earth grounding (ground loop resistance under 4 Ohms) and residual current protection (RCD or RCBO). To avoid surge loads on the electrical infrastructure, integrating motor soft starters is advised. Three-phase 380V models use a magnetic starter, while single-phase 220V units employ an integrated starter capacitor switch. Critical rule: When starting a single-phase motor, never hold the start button down longer than 3 seconds (or more than 20 seconds total during repeated attempts) to prevent overheating and damaging the starting capacitor. Monitoring motor draw via an AC ammeter is recommended: running current must remain within the rated nameplate value, and the motor casing temperature must not exceed 90 °C.
Setting the Clearance Between Die and Roller Assembly
The gap between the flat die face and the press rollers is the primary parameter governing pellet density, compression efficiency, and component service life. A foundational manufacturer guideline: operating the pellet mill idle (dry metal-on-metal) is strictly prohibited. Running the rollers over a bare die without a material cushion causes instant surface deformation, tooth chipping, and channel breakdown.
The working clearance must be maintained within 0.10–0.15 mm. Setup procedure:
- Use two 0.15 mm flat feeler gauges with a width of at least 20 mm (or clean 80 g/m² A4 paper folded in half).
- Place the gauges on the die surface directly beneath each roller. Mandatory condition: the roller tooth must rest on the flat surface, not its groove.
- Gradually and symmetrically tighten the clamping bolts on both sides, lowering the roller shaft until it firmly contacts the feeler gauges without canting. The axis of rotation must remain strictly parallel to the die plane.
- Rotate the die manually to extract the test shims. Once removed, the rollers should turn freely by hand without metal knocking, binding, or play.
- On worn assemblies, roller out-of-roundness can make setting a precise 0.10–0.15 mm clearance difficult. In this case, adjust the rollers until they begin rotating smoothly when turning the die by hand. Remember that a die and its rollers form a matched, worn-in pair; when replacing worn components, always install matched sets from the pellet mills catalog.
Die Polishing Technology: Formulations and Step-by-Step Procedure
To produce a smooth mirror finish within the channel bores, a specialized abrasive lapping compound is used. This mixture gently laps down micro-burrs and machining ridges without compromising hole geometry. The process is executed in two consecutive cycles: starter and finishing.
Polishing Mixture Recipes (calculated for 5 kg batches)
- Starter mixture: 3.5 kg finely ground wheat groats or crushed wheat (particle size up to 2 mm, thoroughly sifted to remove fine flour dust), 700 g clean fine quarry sand, and 700 ml common vegetable or sunflower oil.
- Finishing mixture: 3.5 kg sifted wheat groats (fraction up to 2 mm), 1000 g fine quarry sand, and 700 ml vegetable oil.
Strict operational caution: Under no circumstances should water be added to the polishing mix! Moisture instantly activates grain gluten and starches, creating a sticky paste that bakes under compression, clogging the die holes solid. The mixture should feel greasy, cohesive, yet friable: when squeezed firmly in a fist, oil should glisten without dripping. Once mixed, let the batch stand for 1.5–2 hours so the grain particles absorb the oil evenly.
Step-by-Step Polishing Protocol
- Start the pellet mill motor and immediately drop an initial small handful of starter mix into the compression chamber, creating an oily protective barrier between the rollers and the die.
- Feed the starter mixture in small portions continuously in a loop: catch the extruded mass at the discharge chute and return it to the feed hopper. Run the starter batch continuously for 40 minutes.
- Every 20–30 minutes during operation, drizzle approximately 10–15 g of fresh oil directly onto the roller faces and contact area (total auxiliary oil consumption is about 150–200 g per cycle).
- Discharge the spent starter mix completely and feed the finishing mix containing the higher sand concentration. Continue cyclical granulation for another 40 minutes.
- If intense friction grinds the grain base down into fine flour that sticks to the roller faces, add 1 kg of fresh, dry, sand-free groats to restore a loose texture, allow it to stand for 20–30 minutes, and resume polishing.
- The break-in procedure is complete when compound extrudes steadily through all holes without belt slippage, forming clean, uniform pellets. Final mirror burnishing will occur naturally during the first 20–30 operational hours on standard grain feed.
Raw Material Preparation: Moisture, Particle Size, and Composition
Finished pellet quality and machine throughput depend directly on formulation and mash preparation. Pelletization is a thermo-mechanical process relying on natural grain lignins, proteins, and starches activated by heat and pressure.
- Optimal moisture range (12–20%): The ideal target for most livestock feeds is 14–15%. Check moisture without a moisture meter using a simple tactile test: squeeze a handful of mixed meal firmly in your fist. It should form a firm clump that crumbles into several large chunks when gently tapped. If it disintegrates into powder, it is too dry; if it holds like wet dough or leaves wet residue, it is over-moistened.
- Moistening technique: If meal is excessively dry, spread it evenly on an impermeable plastic sheet, mist with clean water from a garden sprayer, and mix thoroughly. Let the batch stand covered for 30 minutes to allow moisture to equalize through the grain kernels.
- Grinding particle size: The particle size of ground ingredients must be at least 1 mm smaller than the die hole diameter. For consistent results without excess flour dust or coarse uncrushed grains, employ industrial hammer mills. For processing roughage, utilize dedicated grain, straw, and hay shredders. When flaking whole grains prior to pelleting, high-performance grain roller mills are recommended.
- Purity requirements: Feedstock must be completely free of foreign debris, including stones, gravel, wire, and loose metal. Equipping your facility with grain cleaning and sorting equipment protects internal press components from fatal damage.
- Homogeneous blending: Crushed grains, premixes, protein meals, and vitamins must be thoroughly blended before entering the press. For uniform batches, utilize vertical feed mixers or high-efficiency horizontal ribbon feed mixers.
- Material limitations: Small domestic machines with 100 mm dies are engineered for crushed grains, oilcakes, and bran, lacking the mechanical leverage to compress pure wood sawdust. Chopped hay or straw must be blended into grain meal at a maximum ratio of 60% grass to 40% grain. For industrial biomass and wood processing, complete feed and pellet production lines are deployed, while deep grain processing utilizes advanced feed extruders.
Standard Operating Procedure and Thermal Expansion Control
Maintaining a disciplined startup and monitoring thermal conditions in the pressing chamber prevents machine stalls and ensures high output right from the start of each shift.
- Verify roller-to-die clearance with feeler gauges (0.10–0.15 mm).
- Set the pellet cutoff knife: in its top position, pellet length is roughly 2–3 mm (ideal for chicks and young poultry), while in its lowest position it reaches 12–16 mm (suitable for rabbits, pigs, or cattle).
- Switch on the drive motor. Feed the prepared meal into the chamber evenly in small portions (approximately 100–300 g at a time). Installing automated screw feeders (precision augers) eliminates surging and hopper overfilling. Visually, the meal layer should submerge the rollers to roughly 1/3 of their working height.
- Compensating for thermal expansion: As mechanical friction increases, the die reaches an operating temperature of 75–80 °C, which pasteurizes and conditions the feed. Because metal expands under heat, the operating clearance may increase after 10–15 minutes of operation. Stop the machine briefly and symmetrically tighten both roller adjusting nuts by 1/6 to 1/4 turn, preventing roller slippage and preserving die throughput without inducing mechanical knocking.
- Once thermal equilibrium is established, pellet formation stabilizes, motor current settles at nominal rating, and pellets emerge uniform and dense.
Pellet Quality Troubleshooting Guide
Visual inspection of the extruded pellets provides immediate feedback on feed moisture and machine adjustment:
- Hard pellets accompanied by high fines and loose meal: Feedstock is too dry. Incrementally increase moisture with fine spraying until dust drops to minimum levels.
- Pellets emerge hot and slightly soft, but exhibit a shiny gloss: This is normal for freshly extruded feed. As pellets cool in open air, moisture flashes off, starches set, and pellets become firm and rigid. Spread them 3–5 cm deep for natural cooling. Farm-scale setups use drum graders, vibro-screens, and pellet coolers to screen fines and cool pellets prior to bagging.
- Rough, crumbling pellets with mash sticking to rollers: Feedstock is over-moistened. Reduce incoming moisture or blend in drier ground meal.
- Meal fails to extrude despite proper moisture: Die channels require further polishing or the roller gap is excessive. Repeat the abrasive polishing cycle or readjust roller clamping force.
Clearing Clogged Die Channels
If an oversized particle, an unground kernel, or a sudden power failure clogs the die holes solid, never attempt to clear the obstruction by restarting the motor under load. Never drive punches, nails, or hardened steel drift pins into the holes, as this mushrooms the entry chamfers and permanently ruins hole geometry.
Safe unblocking protocol:
- Completely de-energize the unit, lock out the breaker, and unplug the main power cable.
- Remove the roller assembly and extract the die using the dedicated threaded hub puller supplied with the unit.
- Select a brand-new high-speed steel twist drill bit matching the exact factory diameter of the die holes (e.g., 2.0 mm, 3.0 mm, or 4.0 mm) with zero runout.
- Mount the drill bit in a hand drill or drill press and carefully drill out the baked meal plugs at a strict 90-degree angle to the die face, preventing any scuffing of the hardened channel walls.
Shift Shutdown: Preserving the Die with an "Oil Plug"
The single most important maintenance rule for flat-die pellet mills is never to let a hot die cool down packed with standard dry feed. As the residual moisture evaporates, baked grain starches set like cement, creating an obstruction that will stall the motor upon the next startup.
Before shutting down at the end of every shift, pack the channels with an oily mixture:
- Prepare the shutdown mix: blend 300 g of dry wheat groats with 50–70 ml of vegetable oil (or use oilseeds like sunflower or soybean, or fresh oilcake produced by oil screw presses).
- Feed this mixture into the hopper and cycle it through 2–3 times, displacing all dry working feed from the die channels. Soft, oily pellets will remain inside the holes during downtime.
- De-energize the unit.
- Loosen the adjustment bolts to disengage the rollers from the die face. This eliminates thermal stresses and prevents roller distortion as the hot assemblies cool down.
- Clear the hopper and discharge tray of dust. The next morning, the pelletizer will start smoothly and effortlessly without tripping breakers or slipping drive belts.
Feed Storage, Routine Maintenance, and Operational Safety
After cooling and stabilization, finished pellets are transferred to storage or directly to livestock. To safeguard feed against moisture, ambient humidity, and rodents, farms rely on weatherproof galvanized feed storage silos, while pig-farming operations deploy dedicated automated "Mriya" pig feeders. When producing fuel pellets, the final product serves as clean fuel for automated heating systems and specialized pellet burners.
Routine service ensures consistent performance across many seasons. Check roller bearings daily before each shift: they must spin smoothly without play or roughness. Every 500–600 operating hours, grease the main shaft bearing assembly via the grease nipple using high-temperature grease until fresh grease emerges from the relief port.
Strictly observe core safety standards during machine operation:
- Never push raw material into the hopper with hands, sticks, or scrapers while rollers are rotating.
- Never operate the machine without protective belt drive covers or without a verified earth ground.
- Never leave an operating pellet press unattended.
- Wear snug-fitting work clothing with secured sleeves and keep hair tied back to eliminate entanglement hazards.
Following this comprehensive guide on initial startup, abrasive polishing, and systematic clearance adjustments ensures that your pellet mill reaches its maximum rated throughput quickly, extends component life, and delivers high-quality pelleted feed for your livestock.